
UV Flatbed Printing Jigs in India: Stop Misaligned Keychains, Nameplates and Repeat Orders
A practical Indian print-shop guide to UV flatbed jigs, repeatable artwork positioning, safe head clearance, reflective surfaces, and batch quality checks for keychains, cards and nameplates.
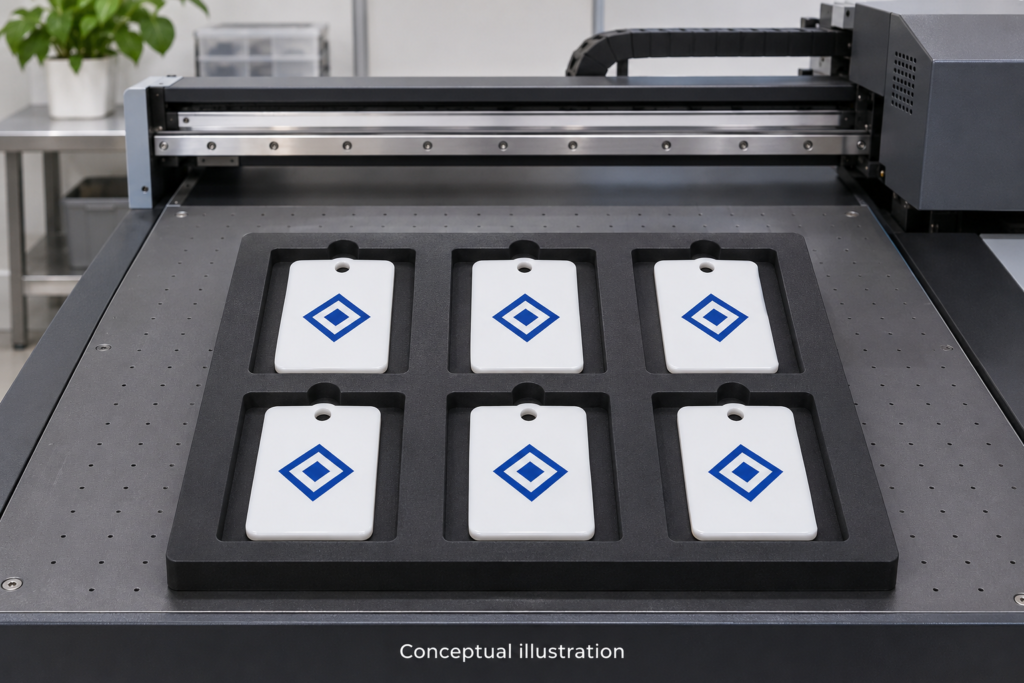
A UV flatbed can print a clean logo on the first acrylic keychain and still misalign the next twenty. The printhead may be working correctly; the problem can be the way the objects are positioned. If a product slides between loading and curing, if the software template and physical pockets use different origins, or if a fixture raises the object beyond safe clearance, a perfectly good artwork file cannot rescue the batch.
For Indian corporate-gifting workshops and custom merchandise manufacturers, the practical question is not only “Which UV printer can print on this material?” It is “Can another operator load the same product tomorrow and get the same print position without guessing?” This guide explains how to design and test a UV flatbed printing jig for direct-to-object printing on compatible acrylic keychains, nameplates, cards and other small rigid items. It is not a UV DTF transfer-film tutorial, and it does not promise that every ink will adhere to every material.
What a UV flatbed jig actually does
A jig, also called a fixture or nest, is a repeatable holder fitted to the printer bed. Its pockets, edge stops or pins locate each blank in the same physical position. A matching artwork template tells the RIP software where to place each printed design. These two halves must agree: physical location and digital coordinates. A fixture may also stop lightweight pieces rolling during the printer’s height check, and it can cover unnecessary exposed bed areas where appropriate.
For example, an order of 60 identical acrylic name badges can be divided into batches using one precisely registered multi-pocket fixture. That does not mean six pockets always print six times faster: loading, curing mode, white-ink layers, cleaning, and final inspection still contribute to total production time. What the jig aims to reduce is manual placement variation.
Before cutting a jig, document five things
- Blank geometry: measure the actual length, width and thickness of multiple samples, not only the supplier’s nominal size. Note keyring eyelets, raised rims, protective films and any taper.
- Printable face: mark where artwork can safely sit. Keep a clear margin from holes, raised edges, curves and hardware; do not promise bleed-to-edge without a proven test.
- Printer origin: identify the coordinate datum the machine and RIP actually use. Do not assume the top-left of a physical bed is the software’s zero point.
- Height and clearance: verify fixture thickness plus object height, the highest protrusion, and the manufacturer-approved printhead and sensor clearances. Do not reuse a head-height number from another brand’s manual.
- Material and ink: confirm that your selected UV ink and any approved surface preparation are suitable for the specific acrylic, coated metal, plastic or wood blank.
As a useful equipment reference, the HJD-S05 UV6090 catalogue page describes a rigid-media UV flatbed with an optional cylinder fixture. Its flat printing capability and cylinder option are different configurations; check the exact accessory, installed firmware, height range and ink combination in the quotation. For a compact alternative, compare the Locor LC-A3 UV flatbed. Neither listing is evidence that a custom jig will fit without an on-machine trial.
Designing a repeatable six-pocket keychain jig
Begin with the product, not with the full bed width. A simple drawing should show the bed origin, pocket centres, pocket-to-pocket spacing, load direction, safe print region and a unique jig identifier. When drawing the nest, allow a realistic manufacturing tolerance and a way to remove the blank without scratching its printable face. Too-tight pockets can jam; loose pockets allow rotation.
As an illustrative layout calculation only, six rectangular blanks arranged as three columns and two rows require a span of 3 × blank width + 2 × column gap in one axis, and 2 × blank height + 1 × row gap in the other, plus outer margins and any locating hardware. This is geometry, not a recommended pocket size or production rate. Measure the real blanks before cutting an MDF, plastic or machined fixture, and verify that the chosen fixture material is safe for your equipment.
Choose an opaque, non-reflective finish when the printer maker calls for it. Do not introduce a clear acrylic or mirror-like jig solely because it looks neat. Reflections of curing light can create risks for the printhead and the process. Epson’s SureColor V1070 media-loading precautions specifically discuss stabilising loose items with jigs and managing gaps that reflect UV light. Mimaki likewise explains the relationship between raised media, ink mist, head gap and reflected UV light in its thick-media guidance. These are valuable principles, but each manufacturer’s numeric limits apply to its own supported machines—not automatically to an HJD, Locor or Audley model.
Match the jig to the RIP template, not to your eye
Once the jig is fixed in position, establish the real machine origin and place one sacrificial, inexpensive test blank into the first pocket. Create a 1:1 artwork template with the same pocket-centre coordinates, then print an alignment target or low-coverage test pattern using the procedure supported by that machine. Confirm the orientation of the design relative to the operator loading side. A common mistake is to rotate the digital layout while leaving the fixture unchanged, producing a whole tray of incorrectly oriented names.
Save a versioned template with the product name, blank dimensions, jig ID, approved art margin and compatible printer configuration. Keep the file with the job ticket rather than allowing each operator to create an approximate copy. For variable names on identical trophies or badges, lock the base position and change only the text field after proofing a long and short example. Roland’s support material also describes print-and-place templates as an alternative for short runs that do not justify a dedicated fixture. Do not assume such a template is equivalent to a secured jig for objects that move easily.
The safety check that cannot be skipped: height, sensors and UV reflection
With the print carriage parked and the equipment in the maker’s approved setup mode, inspect the highest object and jig feature. A projecting keyring, handle, lip or loose screw can be taller than the area you intend to print. Verify the head-height sensor procedure, the working envelope and whether the jig can catch any moving machine component. Never defeat collision protection to fit a taller item. Keep operators away from moving axes and curing lamps and follow the equipment’s UV shielding and ventilation instructions.
For multiple small objects, an appropriate jig can reduce empty gaps under the curing path and improve physical consistency, but only when designed for the printer. Epson’s documentation warns that highly reflective media and gaps may increase reflected light reaching the printhead. Mimaki warns that excessive head spacing can worsen misting and nozzle problems. Neither statement proves a specific clearance, failure rate or maintenance interval for a different machine. A vendor-approved demonstration with your real object is the final check.
Registration is not the same as ink adhesion
A logo can be centred and still peel. Printing on untreated low-energy plastic, dirty acrylic, oily metal or a coated promotional blank can create a surface-compatibility problem. Start with clean, dry sample pieces and the printer and ink supplier’s approved cleaning method. If the substrate supplier recommends a primer or pre-treatment, validate it for that particular ink combination, the final use case, and operator safety; never improvise with an unknown solvent.
HP’s UV ink adhesion guidance notes that performance depends on substrate properties and recommends testing new materials before bulk buying. A production approval should therefore include both artwork alignment and a documented adhesion check performed after the ink system’s specified conditioning or curing period. Avoid promising scratch resistance, dishwashing suitability, food-contact safety or outdoor durability without supporting certification and application testing.
A one-sheet print-shop job card for a 100-piece order
| Stage | Record before production | What makes you stop |
|---|---|---|
| Customer proof | Approved name/logo, colour reference, print dimensions | Missing approval or text mismatch |
| Blank inspection | Supplier, lot, measured dimensions, finish | Mixed sizes or raised/damaged face |
| Jig | Jig ID, secure location, pocket fit, approved material | Movement, warp or loose protrusion |
| RIP template | Exact template revision, X/Y origin, orientation | Mismatch with physical nest |
| Machine | Approved clearance, nozzle check, UV/ink mode | Collision or quality warning |
| First article | Photograph of first acceptable item; adhesion test plan | Offset artwork, mist or poor cure |
| Batch QA | Periodically inspect position, names and adhesion | Drift, peeling, wrong text or damaged blank |
Keep a labelled first-article sample at the workstation. When a new operator takes over, or the blank supplier, fixture or RIP template changes, repeat the first-article check. For corporate gifts, one misspelled executive name is a quality failure even if the mechanical registration is perfect.
Buying a UV flatbed for promotional products: what to demonstrate
Do not select a UV flatbed only from an advertised bed size or printhead count. Bring three representative items: a flat, opaque nameplate; a small acrylic blank; and the lightest or most awkward object you intend to print. Ask the supplier to demonstrate the actual print setup, how the jig is fixed, how the height check behaves, and whether the finished ink stays on the chosen surface. Confirm whether white ink, varnish, rotary attachments and visual-positioning features are standard or optional in the quoted configuration.
Review the ProlificGeeks industrial machine catalogue and the HJD-S05 UV flatbed/cylinder example as model-specific starting points. Read the existing UV DTF versus direct UV printing guide if you are unsure whether to print directly or transfer a ready-made decal. A fixture for direct UV printing is not needed in the same way for a UV DTF transfer workflow.
Current technical manufacturer guidance was checked on 19 November 2026. No independently measured India-wide demand, keyword-volume estimate, or throughput benchmark was available for this article. Corporate gifting, nameplate and personalised product examples are plausible buyer-use cases inferred from available printer applications, not a quantified market-growth claim.
Frequently asked questions
Can I use double-sided tape instead of a jig?
Only where the equipment and substrate maker approve the method and it securely holds the object without leaving residue, height variation or debris. For repeatedly loaded small objects, a properly designed jig is generally easier to document and inspect.
Will one jig fit any UV flatbed printer?
No. Bed dimensions, table fixing points, software origin, sensor location, head-clearance procedure, and print zone differ. A fixture must be validated for the exact machine and its configuration.
Can acrylic, glass and metal share one UV ink profile?
Do not assume so. They can differ in surface energy, coatings, reflectivity, cleaning procedure and adhesion requirements. Prove each material and ink combination separately.
What if artwork is aligned in one pocket but not in the others?
Check that pocket-centre positions and spacing in the artwork match the measured jig, and that the fixture has not warped or shifted. Do not compensate by manually dragging individual objects into place after each print.
Is a black jig always mandatory?
Follow the relevant equipment manufacturer’s requirements. A matte opaque, low-reflection jig is often preferred to reduce UV reflection, but its construction and dimensions must still be approved for the machine.
Does a jig eliminate the need to inspect every order?
No. It improves repeatability; it cannot detect spelling errors, wrong artwork revisions, damaged blanks, under-cured ink or poor adhesion. Use first-piece and in-process inspection.
Next step: test the real blank before deciding the machine
Send ProlificGeeks the dimensions and photographs of your target keychain, nameplate, badge or gift, your expected batch quantities and the intended surface finish. Ask for a demonstration of an actual blank on the proposed machine and a written checklist of compatible fixture, ink and finishing requirements. Start from the ProlificGeeks machine consultation page. A sample-backed, configuration-specific decision is more useful than selecting a machine from an unsupported headline speed or universal-material claim.
Technical sources reviewed 19 November 2026: Epson, “Media Loading Precautions” (SureColor V1070); Mimaki, “Cautions to print on Thick or Solid media”; Roland DGA, LEF-20 support resources on print-and-place templates; HP, “UV-curable inks adhesion”. These are manufacturer-specific guidance documents; obey the relevant selected machine manual. Internal model information from ProlificGeeks catalogue pages was used only as a buying reference, not as proof of compatibility with the illustrated jig. AI-generated imagery, when used, is conceptual rather than a photograph of an offered model.